
Complete Ethernet Cable Installation and Selection Guide
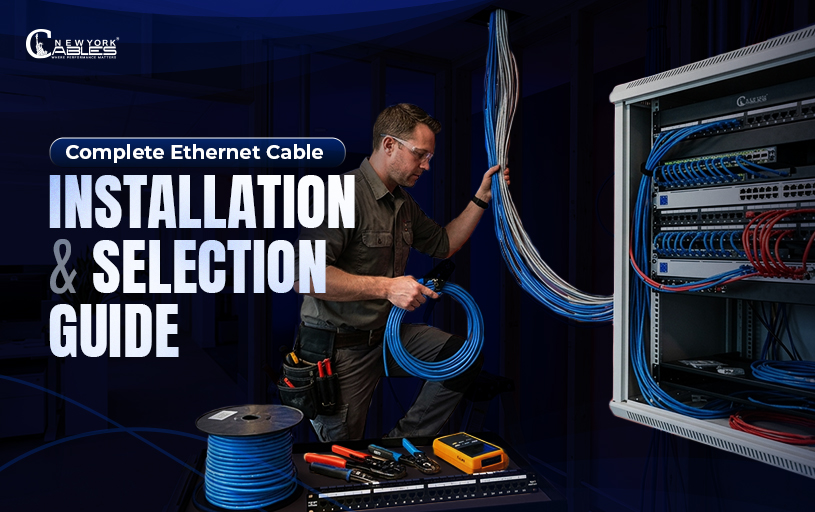
A dependable network is built long before the first device connects to the internet. Every decision, from selecting the right cable category to planning the installation route, affects how well the network performs over time. A carefully installed Ethernet cable can deliver years of stable connectivity, while a poor installation may lead to slower speeds, frequent disconnections, and unnecessary maintenance.
Although WiFi has improved significantly, Ethernet remains the preferred choice for businesses, gamers, home offices, surveillance systems, and environments where network stability matters most. A physical connection provides consistent bandwidth, lower latency, and better resistance to signal interference than most wireless networks.
Many installation issues are avoidable. Using the wrong cable category, selecting an unsuitable cable jacket, bending cables too sharply, or ignoring industry installation practices can reduce network performance even when expensive networking equipment is used. Understanding Ethernet cable categories before starting an installation helps prevent these problems and makes future upgrades much easier.
This guide explains how to select the appropriate Ethernet cable, prepare for installation, choose the correct hardware, and follow proven installation practices that comply with modern networking standards. Whether you are wiring a single room or an entire building, these recommendations will help you build a reliable and efficient network.
How Do You Choose the Right Ethernet Cable?
Selecting an Ethernet cable is about much more than choosing the highest category available. Every cable category is designed with different performance capabilities, making certain options better suited for specific environments.
The most common categories today are Cat5e, Cat6, and Cat6A. While Cat7 and Cat8 also exist, they are generally intended for specialized installations such as industrial facilities and data centers rather than typical homes or offices.
Cat5e Ethernet Cable
Cat5e remains a practical solution for Gigabit Ethernet networks with bandwidth of 350 MHz. It supports speeds up to 1 Gbps over a distance of 50 meters and 100 Mbps up to 100 meters. Cat5e Ethernet cable is suitable for networking in smart homes, small offices, and schools.
Cat6 Ethernet Cable
Cat6 offers higher bandwidth of 550 MHz and improved resistance to crosstalk because of its tighter internal twists and enhanced construction. Under the ANSI/TIA standards, it supports 1 Gbps up to 100 meters and can support 10 Gigabit Ethernet over shorter distances, typically up to 50 meters depending on installation conditions.Cat6 is an ideal choice for networking in data centers, offices, and industrial settings.
Cat6a Ethernet Cable
Cat6A is designed for environments that demand greater performance and high-bandwidth of 750 MHz. It supports 10 Gigabit Ethernet across the full 100 meter channel while providing additional protection against electromagnetic interference. This makes it a popular choice for enterprise offices, healthcare facilities, and high density commercial networks.Instead of focusing only on speed, consider future growth. Installing a cable is often the most time consuming part of the project. Choosing a category that supports future bandwidth requirements can prevent expensive rewiring later. Understanding the differences between Cat5e, Cat6, and Cat6A in depth also makes it easier to balance performance with budget.
Which Cable Jacket Should You Use?
The cable jacket protects the conductors inside, but its purpose extends beyond physical protection. It also determines where the cable can be installed safely according to building regulations.
Many first time installers pay attention to the cable category while overlooking the jacket rating. This can create safety concerns and even violate local building codes.
Communication Multipurpose (CM)
PVC cables are commonly used for standard indoor applications where fire resistant materials are not required. They are frequently installed inside individual rooms and short network runs.
Communication Multipurpose Riser (CMR)
Riser rated cables are designed for vertical pathways that connect multiple floors. Their jackets help reduce flame propagation, making them suitable for riser shafts and other vertical spaces in commercial and residential environments.
Communication Multipurpose (CMP)
Plenum rated cables are manufactured using low smoke compounds intended for environmental air handling spaces, such as suspended ceilings used by HVAC systems. In the event of a fire, these cables release significantly less smoke than standard PVC cables, helping improve occupant safety.
Communication Multipurpose (CMX)
Outdoor installations require an entirely different approach. Exposure to sunlight, moisture, and temperature changes can quickly damage indoor cables. Outdoor rated or direct burial cables include additional protective materials that withstand these environmental conditions for many years.
Selecting the correct Ethernet cable jacket is just as important as choosing the appropriate cable category. Likewise, understanding plenum cable types, riser cable applications, and the environments where each should be installed helps ensure both safety and long term reliability.
Plan the Installation Before Pulling Cable
Professional installers rarely begin by feeding cable through walls. The planning stage often determines whether the installation will be efficient or frustrating.
Identify Connection Locations
Start by identifying every location that requires a wired connection. Computers, wireless access points, smart televisions, security cameras, network printers, and VoIP phones should all be included in the initial layout.
Measure Cable Routes
Next, measure the cable route instead of estimating it. Ethernet standards recommend a maximum channel length of 100 meters, including patch cords. Exceeding this distance increases signal attenuation and may reduce network performance, especially on higher speed networks.
Avoid Electrical Interference
The cable route should avoid unnecessary exposure to electrical wiring. Running Ethernet cables parallel to power cables for long distances increases the likelihood of electromagnetic interference. When the two must cross, crossing at approximately ninety degrees helps minimize signal disruption.
Plan Future Expansion
It is also worth planning for future expansion. Installing an additional cable during construction is usually far easier than opening finished walls several years later. Leaving spare capacity today often saves significant time and expense in the future.
Finally, label every cable at both ends before termination. Proper identification simplifies maintenance, speeds up troubleshooting, and reduces confusion whenever new equipment is added to the network.
Essential Tools and Hardware
Even the highest quality Ethernet cable cannot perform properly if it is installed using unsuitable tools or poorly matched hardware.
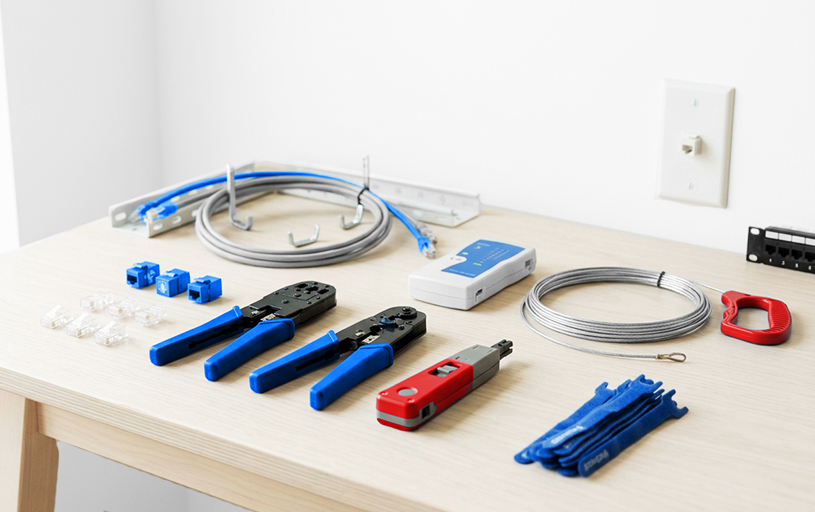
A standard installation typically requires RJ45 connectors, keystone jacks, a crimping tool, a punch down tool, cable strippers, fish tape, a cable tester, and cable management accessories.
RJ45 connectors terminate cables that plug directly into networking equipment. Keystone jacks are commonly installed behind wall plates or patch panels, creating a cleaner and more organized structured cabling system.
Patch panels become increasingly valuable as the number of cable runs grows. Instead of connecting every cable directly to a network switch, installers terminate permanent cabling at the patch panel before using short patch cords to connect the equipment. This approach simplifies maintenance and protects permanent cable runs from repeated movement.
Cable management should not be overlooked. Supporting cables with trays, hooks, or Velcro straps helps maintain proper bend radius while reducing stress on the cable. Plastic zip ties that are tightened excessively may compress the twisted pairs inside the jacket, potentially affecting performance.
Choosing compatible network hardware and cable termination components ensures every part of the installation works together efficiently and supports the expected network speeds.
How to Install an Ethernet Cable Properly
A successful Ethernet installation depends as much on technique as it does on cable quality. Even a premium cable can underperform if it is pulled incorrectly, bent beyond its recommended limit, or terminated without following proper wiring practices.
A carefully planned installation steps protects the cable’s internal structure, maintains signal quality, and ensures reliable performance throughout the network’s lifespan. Every stage, from preparing the pathway to organizing finished cable runs, plays an important role in preventing future connectivity issues.
Inspect the Installation Pathway
Before installing Ethernet cable, inspect the entire pathway carefully. The route should be evaluated for potential obstacles that could damage the cable during installation or after it has been placed.
Sharp edges, sources of heat, electrical conduits, and areas where cables may experience pressure should be identified before pulling begins. Addressing these challenges early reduces the risk of damaging the cable jacket, exposing internal conductors, or creating performance issues later.
A properly planned pathway also makes the installation process smoother. Instead of forcing the cable through unsuitable spaces, installers can choose routes that provide better protection and easier access for future maintenance.
Maintain Proper Pulling Technique
As the cable is installed, avoid applying excessive pulling force. Copper conductors inside Ethernet cables are designed to carry signals with precision, but excessive tension can stretch the conductors and affect their electrical performance.
Most manufacturers specify a maximum pulling tension limit for their cables. Staying within these guidelines helps preserve the cable’s original characteristics and prevents internal damage that may not be visible from the outside.
Careful handling during installation is especially important for longer cable runs. Rushing the pulling process or forcing cables through tight spaces may create problems that only appear after the network is fully operational.
Maintaining Proper Bend Radius
Another important consideration during installation is bend radius. Ethernet cables should never be folded sharply around corners or tightly wrapped around hooks because excessive bending can change the internal arrangement of twisted pairs.
The twisted structure inside Ethernet cables plays a critical role in reducing crosstalk and maintaining signal integrity. When cables are bent beyond their recommended limits, the spacing between conductors can be affected, potentially reducing network performance.
Maintaining gentle curves throughout the installation helps protect the cable’s internal geometry and ensures that it continues to perform according to its rated specifications.
Organize Cable Runs
When routing multiple Ethernet cables together, proper cable management becomes essential. Cables should be organized using hook and loop straps instead of tightly fastened plastic ties, which can compress the cable jacket and place unnecessary pressure on internal conductors.
A well-organized cable pathway improves airflow, simplifies troubleshooting, and makes future upgrades easier. Good cable management also protects the installation from unnecessary stress caused by unsupported or tangled cable bundles.
For installations using Power over Ethernet devices such as wireless access points, IP cameras, or VoIP phones, cable selection becomes even more important. The chosen Ethernet cable should support the required PoE standard because higher power applications can generate additional heat inside cable bundles. Proper spacing, organization, and compatible cable selection help maintain safe and reliable network performance.
How to Terminate Ethernet Cables Correctly
Termination is where precision matters most. A cable installed perfectly through walls can still fail if the connector is terminated incorrectly.
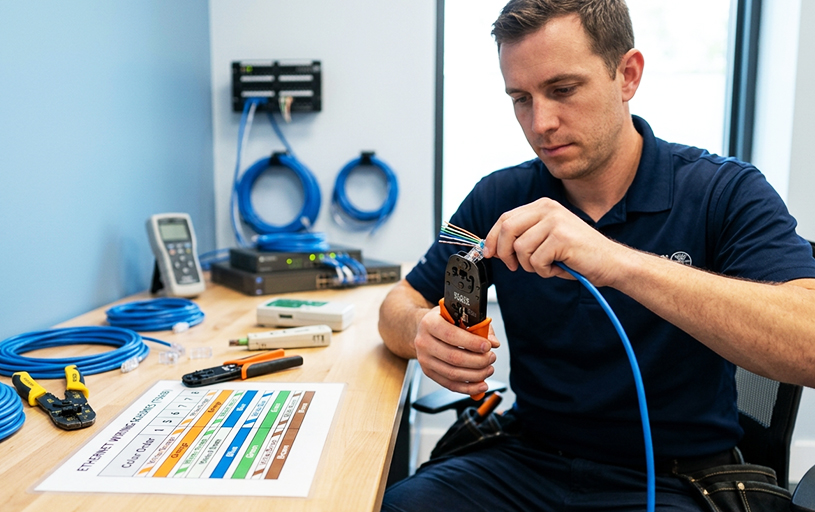
Most Ethernet installations follow either the T568A or T568B wiring standard. Both standards provide identical network performance when used consistently throughout the installation. Problems usually occur when one end of the cable is terminated using T568A while the opposite end uses T568B without intentionally creating a crossover cable.
Before arranging the conductors, remove only enough jacket to expose the twisted pairs. Untwisting the wires farther than necessary increases susceptibility to crosstalk and can reduce overall performance.
Each conductor should remain as close as possible to its twist until it reaches the connector or keystone jack. This small detail often separates professional installations from unreliable ones.
When using keystone jacks, verify that each conductor is fully seated using a punch down tool. Loose connections may function initially but often become intermittent over time, especially in environments subject to vibration or frequent temperature changes.
After termination, inspect both ends carefully. Even one misplaced conductor can prevent the cable from operating at its intended speed.
Using compatible Ethernet cable termination steps and quality connectors also helps maintain performance across the entire channel.
Test Every Cable Before Deployment
Many installers make the mistake of assuming that a completed installation is automatically a working installation. Testing every cable before connecting network equipment saves hours of troubleshooting later.
The simplest verification begins with a wire map test. A cable tester confirms that every conductor reaches the correct pin on the opposite connector while identifying common problems such as open circuits, shorts, reversed pairs, and split pairs.
For commercial installations, certification testers provide far more detailed information. These devices measure insertion loss, near end crosstalk, return loss, propagation delay, and other characteristics defined by ANSI/TIA standards.
Ethernet Cable Testing Checklist
Before connecting network equipment, verify that:
- All conductors are properly connected: Confirm that each wire reaches the correct pin and follows the selected T568A or T568B wiring standard consistently.
- No wiring faults are present: Check for open circuits, shorts, reversed pairs, and split pairs that can affect network performance.
- Cable performance meets requirements: For commercial installations, ensure certification testing confirms compliance with the required Ethernet category standards.
- Terminations are secure and properly installed: Inspect RJ45 connectors, keystone jacks, and patch panel connections for loose or incorrectly seated wires.
- Cable routes are free from damage: Look for signs of moisture, excessive heat exposure, crushing, or physical stress that could impact performance.
If a cable fails testing, avoid replacing it immediately. Begin by inspecting both terminations. Most failures result from incorrect conductor placement, excessive untwisting, or poorly seated connectors rather than defective cable.
Environmental conditions should also be considered. Moisture, excessive heat, or physical damage may affect cable performance, particularly in outdoor installations.
Performing routine cable testing and troubleshooting ensures every connection meets the expected performance before users begin relying on the network.
Maintain Your Network for Long-Term Reliability
Installing a network is only the beginning. Regular maintenance keeps the infrastructure operating efficiently as additional devices and higher bandwidth demands are introduced.
Inspect exposed cables periodically for cuts, crushing, excessive bending, or damaged connectors. Even minor physical damage can affect long term reliability.
Maintain accurate documentation whenever new cable runs are added or existing ones are relocated. Proper labeling allows technicians to identify individual connections quickly, reducing downtime during maintenance.
Dust and debris inside network cabinets should also be removed regularly. Clean patch panels and organized cable management improve airflow around switches and other active networking equipment.
As businesses expand, bandwidth requirements often increase. Applications such as cloud computing, 4K surveillance, virtualization, and high resolution video conferencing place greater demands on existing infrastructure. Planning upgrades before performance issues appear helps avoid unexpected downtime.
In environments where extremely high bandwidth or long distance communication becomes necessary, fiber optic installation and maintenance may become the next logical step for supporting future network growth.
When Should You Choose Plenum Cable?
Not every installation requires plenum rated cable, but understanding where it is appropriate helps prevent costly mistakes during construction or renovation.
Buildings containing environmental air handling spaces often require plenum cable to comply with fire safety regulations. These spaces include certain suspended ceilings and raised flooring systems used by HVAC equipment.
Because plenum cable is manufactured using low smoke materials, it helps reduce the spread of smoke during a fire. This characteristic makes it a preferred option in schools, hospitals, office buildings, and other commercial environments where occupant safety is a priority.
Residential installations generally do not require plenum cable unless local building codes specify its use. However, homeowners planning structured wiring projects sometimes choose it voluntarily because of its enhanced fire performance and long service life.
Understanding the practical benefits of plenum cabling and selecting the appropriate jacket for each environment ensures the installation remains both compliant and dependable.
Conclusion
A stable Ethernet network begins with informed decisions rather than expensive hardware. Selecting the correct cable category, choosing an appropriate jacket, planning cable routes carefully, and following recognized installation practices all contribute to long term network performance.
Attention to detail during termination and thorough testing after installation are equally important. Small installation mistakes often remain hidden until network demands increase, making preventive best practices far more valuable than corrective repairs.
Whether you are wiring a home office, upgrading a commercial building, or designing a structured cabling system from the ground up, following industry standards helps create a network that is efficient, scalable, and dependable for years to come.
Frequently Asked Questions
1- What is the maximum length of an Ethernet cable?
According to ANSI/TIA structured cabling standards, the maximum channel length for most copper Ethernet installations is 100 meters, including permanent cabling and patch cords.
2- Can Cat6 support Power over Ethernet?
Yes. Properly manufactured Cat6 cable supports PoE, PoE+, and higher power standards when installed according to manufacturer recommendations and applicable IEEE specifications.
3- Should I choose shielded or unshielded cable?
Unshielded twisted pair cable is suitable for most homes and offices. Shielded cable becomes beneficial in environments containing heavy electrical equipment or significant electromagnetic interference.
4- What happens if T568A and T568B are mixed?
Using different wiring standards on opposite ends creates a crossover cable. While crossover cables have specialized applications, they should not be used unintentionally in standard structured cabling installations.
5- Why is my cable tester reporting a failure?
Incorrect conductor placement, split pairs, damaged connectors, excessive untwisting, or physical cable damage are among the most common causes of failed cable tests.
6- Can Ethernet cables run alongside electrical wiring?
Whenever possible, Ethernet cables should be routed separately from power cables. Maintaining adequate separation helps reduce electromagnetic interference and preserves signal quality.